Showing posts with label CTMH. Show all posts

Sunday, January 22, 2012

BFF Betty

I made this card the other day and I just love how it turned out!
this was the first time I have ever used white hair...well kinda bluish-white, and that is my first bow like that...and you will be seeing them more often I love them! I used my everyday Teen scene simply Betty stamp and I think this may be one of my faves! the "best friends" stamp came from CTMH...I was sure to use a Betty so I could enter it into the Simply Betty challenge.
I also followed the sketch from Critter Sketches this week.

Edit: I'm so sorry I forgot to mention where my coloring inspiration came from...on the Simply Betty DT there is so much inspiration...I have a huge folder on my desktop of coloring ideas, and this one came from Lelia...her blog is full of inspiration, be sure to take a look...again I'm sorry Lelia I wasn't meaning to just steal ideas and run, I fully intended on giving you credit!

Saturday, October 15, 2011

Dragonlets for day 15

I just love weekends! don't you?
Today is day 15 of the Smeared and Smudged 31 day's of Halloween...I think were about half way threw this...bitter sweet...I love seeing everyone's projects!
today I have an image from Delicious Doodles to share with you....

this image is called Dragonlets and Me...isn't it cute?!? It was a freebie for the CDAC Progressive challenge for round 4, also there is a challenge at the Delicious Doodles blog for a Halloween card with no Orange....wahoo!

I colored the image with my pencils, and added sparkles to her wings, then stuck her to some green skully K&Company paper and the "Happy Hauntings!" stamp came from CTMH

be sure to check out all the other "Wicked Bloggers" they are on my sidebar---->

Monday, February 28, 2011

Shaken Dreams

here is another card I made over the weekend. this one was for the dream challenge at VSN


I love this image and when I saw the Shaker challenge at Tiddly inks I just knew what had to be done...I love this card! my senti came from CTMH I thought it was just perfect...I love playing with this card...if DH would ever hand it over....I'm going to have to make him one too...something dark and with monsters...ha ha monsters and glitter :) I made myself giggle :)

I'm also entering this into the following challenges
Flutter by Wednesdays - fairy

Sunday, November 21, 2010

Life is sweet vampire

today I have made a card using my new Digi from SBS her name is Vampiress Darcy and she is currently on sale! The Challenge at the Simply Betty challenge blog is digi meets rubber, you are to use both of them...so I used my CTMH stamps for the background and the sketch I got from The Sweet Stop their challenge on top of the sketch is to decorate the inside...so I did that too....and last but certinly not least over at the Smeared and Smudged there is a photo inspiration challenge! and that is where I got my color idea from!
I colored the card with markers and that lil flower embelli is also from CTMH

Wednesday, November 10, 2010

Chirstmas cards

here is a card I made for the Stamp it Crazy challenge this week....

I also did it to start to get into the holiday spirit over at smeared and smudged we are having a 12 days of Christmas hop....sigh....I don't know if you were with me during October but for some reason I'm doing it again....honestly I'm a little excited I have some pritty cool stuff to work with....this card was kinda my guinea pig....the white on his hat and coat are puffy paint...that was fun to play with....and his beard is gray and white puffy paint, and the cute dragon is all sparkled up! the image I got from Dustin Pike and the stamps (snowflakes/senti) are from CTMH

I'm entering this into the following challenges
Stamp it crazy-sketch, green, red, button, santa
fun at Fairy Knoll-hot mess

Wednesday, October 27, 2010

Day 27 and Bombshell Blog Hop!

Welcome to the Bombshell blog hop as well as day 27 of the 31 day's of Halloween!

today I have a card for you that is tottally ispired by Terra! she made one...I think last year...and I love it so much I just had to make my version!

I actually made this card to give to my dad for Halloween! the car is from the Speed Shop set, and she the Bombshell Angel
I colored it all with markers and added some glitter to the skulls, the border around the car is from CTMH and embossed in orange...

your next stop is Kathi

here is a list of the other blogs so be sure to hop along and see what other bombshell/day of the dead projects they have in store for ya!
Bombshell Stamps Blog
Alaine
Alison
Cheryl
Kelli
AnitaMarie
Katie
Meredith
MaryAnnK
Kapree
Kathi
Kas
also be sure to check out the other Wicked blogs for their day 27 of the 31 days of Halloween!
I'm also entering this card into the StampitCrazy challenge this week...wich is "goin my way"

Sunday, October 3, 2010

Day 3 of S&S 31 days of Halloween

Welcome to day 3! Happy Sunday!

Today I decided to do something other than a card, I have been working on a bunch of decorations that I can’t wait to show…but I do still have to send out my Halloween cards so there will be plenty of them too….but with all these decoration ideas I’m getting from this hop…how can you not!?!?

So I made a few candles…I have been wanting to try out this technique ever since I got my heat gun… I got these candles and some tissue paper stamped my CTMH stamp on with black stayzon ink and then heated it…so cool I want to make a bunch more and maybe give them away or something!

don’t forget to stop by the S&S forum and check that place out…we all have so much fun and we are getting allot of new members so you won’t be new alone =) That’s all I have for today so have fun horrifyingly hopping along, or sinisteringly lurking, and I’ll see ya when I see ya…

here is a little more details on how I did this...really its so simple don't over think it...

  1. stamp you image on white tissue paper (used for gift bags)
  2. cut out your image as close as you can get
  3. position image over candle
  4. heat image onto candle...just wave the heat gun back and forth until the image melts into the candle.

and thats all there is too it...I hope this helps

Sunday, September 19, 2010

Sassy Gum

ok some how I found this super sassy website...they have digis and my fave...challenges! Its called Sassy Studio Designs, and the challenge this week is to create anything but a card so I made this....uh I don't know what you would call it....I altered a gum wrapper for Halloween, and if I get around to it I will make a bunch of these to give away...but ya I took their digi and made her into a Frankenstein but a hot one....I just love it! I also entered this into the Stamp Something challenge which was to use a digi...easy enough....

Wednesday, September 15, 2010

Simply Betty Halloween

over at the Simply Betty Stamps blog there is a fantastic hop and a challenge...and as you can tell I love myself a challenge...so the challenge was to create a Halloween themed item using a SBS that is NOT Halloween and make it Halloween....so I took Betty and stuck her on this Tri-Shutter card (my first) and gave her a Halloween mask...it moves and is so fun....her pooch even dressed up! I love it and may just keep it up all year round!
oh ya I almost forgot the inside panel says Trick or Treat...the skull stamps and background paper is CTMH thriller stamp of the month....are in the right panel of my blog.
speaking of blog hops...be sure to check back tomorrow for a S&S blog hop...

Saturday, August 7, 2010

hedgehodg cuteness

This is my new CTMH stamp...I just love these lil hedgehogs they are so cute... I used the Skipping Stones sketch and I had so much fun with it... I stamped him on beleive it or not...sandpaper...it was just sitting there when I was looking for brown paper...and the texture to it made him look fluffy... I love it!

Wednesday, November 25, 2009

gingerbread house

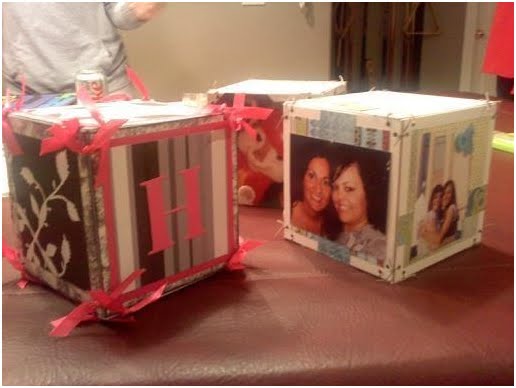
I was blog hopping and came across this cute idea on Paige Dolecki's blog http://www.paigespaperparadise.blogspot.com/ so I just had to make it…this is what I did

Finished size is 2.5" square with 5.5" height.

Paper Dimensions you'll need:
4x4" Brown Bag Cardstock
6x12" Brown Bag Cardstock
4.75"X4.75" Brown Bag Cardstock

1. Create the box base with the 4x4" brown bag.
- Score .75" in at all sides
- Cut slit on ONE side of each of the scored squares in the corner
- Use HEAVY DUTY adhesive (I used glue dots) in the corners to adhere.

2. Score your 6x12" at the following dimensions (starting from one side):

- 2.5", 5", 7.5", 10"

score .5" along the top edge (you will fold this down and adhere after you've embossed to make the top edge of your box sturdier!)

3. Stamp your house design in Chocolate. Note that the "front" of the house should be on the second panel - this will keep the seam away from the front of your house!

4. Add your adhesive!

- NOT SHOWN - fold down your .5" lip at the top of the house panel and adhere now. This will give the top of your box a sturdier edge.

- To build the box put adhesive on the bottom and on the side that is the last panel of your house (the smaller 2" blank edge will be folded inside).


5. Roll your box bottom along the bottom edge of your house lining things up!

- Make sure your box is squared up as you adhere your long house edge.

- When you have everything adhered gently place your hand inside and press all the edges to make sure things are stuck down good and tight!

6. Make your roof lid with your 4.75"x4.75" Brown Bag Carstock piece.

- Score at 1" on all sides and then do your stamping.

7. This is how your lid will look.

- Now cut one slit at each of the corner squares and assemble exactly as you did your box base!

8. Optional - add a bit of Chocolate ink to distress and "bake" your gingerbread.

9. Add a pretty ribbon around the whole box and you are ready for the holiday gift giving season!

This little house is just perfect for a small bag of chocolates, a couple of envelopes of gourmet cocoa, some spiced cider, some special soaps or anything else you want to present that would fit!


my creations memory cube

My mom's club night they made these photo boxes I thought were so cute...and so easy!
some are sealed up others have an open top to put treats or something in to give away as a gift!
to cute!!!


Monday, October 19, 2009

my creations memory keeper

My mom and her club made some card/treasure boxes and they turned out really cute...she gave me the recipe that she got threw an email. so here it is

Items needed per person:
My Creations Memory Keeper
(1) Emporium Level 1 Kit
(1) Extra sheet of Cocoa Cardstock
Extra embellishments as desired

Cocoa Cardstock: Cut one sheet to 9-1/2 x 9-3/4 (for top of box) With scrap left over, cut a piece to 9-3/4 x 1-1/4 (for box flap) Cut extra sheet of Cocoa CS to: (2) 2-1/2 x 9-3/4 (for front and back of box) (2) 2-1/2 x 9-1/2 (for sides of box)

Small Circle B&T (I used the back side of B&T): (2) 2-1/4 x 9-3/4 (for front and back of box) (1) 1 x 9-1/2 (for box flap)

Floral B&T (2) 9-1/4 x 2-1/4 (for sides of box)

“Main Frame” Preprinted Layout: With green side of page on the left, cut 1-1/2 off left side and 1” off right side. Then cut 1-3/8” off top and bottom Use the large middle piece for box top. Layer on top of 9-1/2 x 9-3/4 Cocoa CS.

and here are some of the Boxes her girls made I really like this first one, her daughter started kindergarten this year and she is using this box to put all her school stuff in it...so cute!

Friday, June 5, 2009

60 Colors


My favorite part right now of CTMH is the colors! I love that they have so many and everything matches!! the pens match the paper and the ink matches the ribbon, EVERYTHING so you don't have to worry about getting the wrong shade of purple it all just fits so perfectly together! it makes decision making that much easier!