
Wednesday, June 30, 2010
Rufus Card
I made a ton of Father's day cards but I have miss placed my memory card for my camera and I know my cell doesn't take the best Pics. so I'll upload them when I find it...in the mean time here is a cute card I did for my mother inlaw... this dog looks just like hers..awww

Friday, June 25, 2010
Changes
there are going to be some changes to the workshop on Wends...it is now closed...I have all the people I can fit around my table at one time. If you and your friends want to have a club night with me or just have a workshop please email me I would be more than happy! There may be an occasion that one of the girls can't come and if you really really want to go then we can squeeze you in but you will have to buy that month's kit, so I'll have to know at least a week in advance. email me if you want more details.
Thanks to all that have participated
Thanks to all that have participated
Wednesday, June 23, 2010
New Cards
I made some cards today with my new Simply Betty stamp check them out...
 this one is for the Oh, Alice challenge...Crazy for Daisy Chains...
 and this one is for a smeared and smudged "Oh the Horror" challenge, as well as the Pile it on challenge
 this one is for the Oh, Alice challenge...Crazy for Daisy Chains...
 and this one is for a smeared and smudged "Oh the Horror" challenge, as well as the Pile it on challenge
Saturday, June 12, 2010
The Burtonesque Dolls Challenge
 this is my submission for the Burtonesque Dolls Challenge #6
The challenge is to use your cutting and distressing tools...
so all the little squares are cut and the edge of the card is distressed...I know the distressing doesn't show up very well in the photo but there it is....cool huh?

Thursday, June 10, 2010
ctmh WOTG
I think we are going to try something new for the monthly workshop...maybe Workshops on the go...we will have to discuss it next week but I think it sounds fun...here are a few fliers of what they are...let me know what you think.


Friday, June 4, 2010
new Apt
My Brother-inlaw is moving into his first apartment! bitter sweet...but I got him a little apartment warming gift and tried to make an apartment card I used liquid glass on the windows I think it turned out cute...the picture just doesn't do it justice one of the windows has sparkly blue shutters too....
nu=3245)7(2)999)WSNRCG=335+624+54327nu0mrj.jpg)
nu=3245)7(2)999)WSNRCG=335+624+54327nu0mrj.jpg)
Saturday, May 15, 2010
Whooo Loves You
 This was a fun layout I found in one of my books....I'm planning on making many many more it was so easy! no worries I'll keep this updated...this was done with all CTMH stamps...how cool is that!
Wednesday, May 12, 2010
New Blogs!
ok I have found some amazing new sights well blogs actually I have linked them all to the side please check them out I have found this whole new world of fun in paper crafting! and I'm excited to share!!
oh and here is a new card I made for the store (my cousin has asked me to make some cards to sell at her store and I'm trying to not be so dark...for her sake)

oh and here is a new card I made for the store (my cousin has asked me to make some cards to sell at her store and I'm trying to not be so dark...for her sake)

Tuesday, March 23, 2010
Keayra's Kreations
$3 Each or 2 for $5
 here is a picture of all the bows that my sister has for sale right now...she can also make some to order like mine...I'll post pictures later....
email me if you are interested...I'm trying to get her a blog set up but its just not coming along very fast
 here is a picture of all the bows that my sister has for sale right now...she can also make some to order like mine...I'll post pictures later....
email me if you are interested...I'm trying to get her a blog set up but its just not coming along very fast
Wednesday, November 25, 2009
gingerbread house
I was blog hopping and came across this cute idea on Paige Dolecki's blog http://www.paigespaperparadise.blogspot.com/ so I just had to make it…this is what I did
Finished size is 2.5" square with 5.5" height.

Paper Dimensions you'll need:
4x4" Brown Bag Cardstock
6x12" Brown Bag Cardstock
4.75"X4.75" Brown Bag Cardstock
1. Create the box base with the 4x4" brown bag.
- Score .75" in at all sides
- Cut slit on ONE side of each of the scored squares in the corner
- Use HEAVY DUTY adhesive (I used glue dots) in the corners to adhere. 
- 2.5", 5", 7.5", 10"
score .5" along the top edge (you will fold this down and adhere after you've embossed to make the top edge of your box sturdier!)

4. Add your adhesive!
- NOT SHOWN - fold down your .5" lip at the top of the house panel and adhere now. This will give the top of your box a sturdier edge.
- To build the box put adhesive on the bottom and on the side that is the last panel of your house (the smaller 2" blank edge will be folded inside).
5. Roll your box bottom along the bottom edge of your house lining things up!
- Make sure your box is squared up as you adhere your long house edge.
- When you have everything adhered gently place your hand inside and press all the edges to make sure things are stuck down good and tight!
6. Make your roof lid with your 4.75"x4.75" Brown Bag Carstock piece.
- Score at 1" on all sides and then do your stamping.
- Now cut one slit at each of the corner squares and assemble exactly as you did your box base!
8. Optional - add a bit of Chocolate ink to distress and "bake" your gingerbread.
9. Add a pretty ribbon around the whole box and you are ready for the holiday gift giving season!
This little house is just perfect for a small bag of chocolates, a couple of envelopes of gourmet cocoa, some spiced cider, some special soaps or anything else you want to present that would fit!
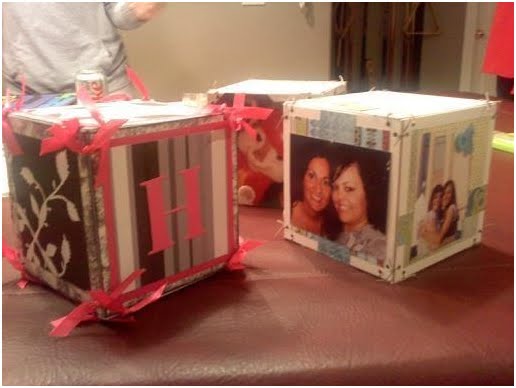
my creations memory cube
My mom's club night they made these photo boxes I thought were so cute...and so easy!
some are sealed up others have an open top to put treats or something in to give away as a gift!
to cute!!!


some are sealed up others have an open top to put treats or something in to give away as a gift!
to cute!!!
Monday, November 2, 2009

Monday, October 19, 2009
my creations memory keeper
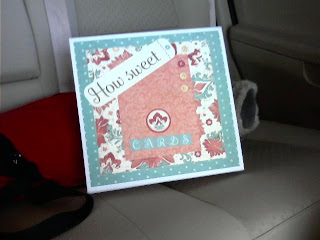
 My mom and her club made some card/treasure boxes and they turned out really cute...she gave me the recipe that she got threw an email. so here it is
 Items needed per person:
My Creations Memory Keeper
(1) Emporium Level 1 Kit
(1) Extra sheet of Cocoa Cardstock
Extra embellishments as desired
Cocoa Cardstock: Cut one sheet to 9-1/2 x 9-3/4 (for top of box) With scrap left over, cut a piece to 9-3/4 x 1-1/4 (for box flap) Cut extra sheet of Cocoa CS to: (2) 2-1/2 x 9-3/4 (for front and back of box) (2) 2-1/2 x 9-1/2 (for sides of box)
Small Circle B&T (I used the back side of B&T): (2) 2-1/4 x 9-3/4 (for front and back of box) (1) 1 x 9-1/2 (for box flap)
Floral B&T (2) 9-1/4 x 2-1/4 (for sides of box)
“Main Frame” Preprinted Layout: With green side of page on the left, cut 1-1/2 off left side and 1” off right side. Then cut 1-3/8” off top and bottom Use the large middle piece for box top. Layer on top of 9-1/2 x 9-3/4 Cocoa CS. 
and here are some of the Boxes her girls made I really like this first one, her daughter started kindergarten this year and she is using this box to put all her school stuff in it...so cute!


Wednesday, October 7, 2009
HAPPY DAY
I just love the delivery man! (even though he gets lost)
it is just such a happy day when I get new stuff its like Christmas!
How could so much fun fit into one small box????
I stayed up all night scrapbooking I'll have to show some of that too...but I was just so happy with my delivery I had to tell all!
it is just such a happy day when I get new stuff its like Christmas!
How could so much fun fit into one small box????
I stayed up all night scrapbooking I'll have to show some of that too...but I was just so happy with my delivery I had to tell all!

Monday, September 28, 2009
Gel Card
.jpg) What I did was...
What I did was...I cut my 12*12 white cardstock in half and folded it to make a 6*6 card
then I measured about an inch in from the edges and made a mark so I knew where to stamp my fishes…I centered my “cranberry” fish and stamped all the “outdoor denim” fish around him (I stamped these directly on my card)
I used my Paper cutter and cut the outdoor denim cardstock just smaller than 6*6 (I don’t know exact measurements) and cut a window 1 inch from the sides and 1 ½ inches from the top/bottom. I then distressed the edges inside and out
I filled the bag with just a little bit of the gel then added some Stickles (or glitter) & smoosh it around (you really don’t need much gel a little goes a long ways)

I cut as much as I could off the top of my bag (above the ziplock seal) then taped it to the inside of the blue paper. You can add reinker to color the gel (or use colored gel)

I then added my saying with brads and taped it to the card…The picture just doesn’t do it justice it so cute (and fun to play with) enjoy!
Saturday, August 8, 2009
Laughter
a good friend at work is going threw a hard time right now so I made her a cd holder with a funny cd in it...I don't know if you have ever heard of Unknown Hinsen but he is hilarious!!!
I took the pic with my phone so its kinda blurry but you get the idea and it made her so so happy! (it says : Laughter is the best medicine)
I took the pic with my phone so its kinda blurry but you get the idea and it made her so so happy! (it says : Laughter is the best medicine)

Friday, August 7, 2009
New Stuff
The new books have arrived!!! and they are full of great new ideas and stamps..I'm so excited about the new Halloween ones (of course) I cant wait to place the next order..it will be very soon...
Friday, June 5, 2009
60 Colors

My favorite part right now of CTMH is the colors! I love that they have so many and everything matches!! the pens match the paper and the ink matches the ribbon, EVERYTHING so you don't have to worry about getting the wrong shade of purple it all just fits so perfectly together! it makes decision making that much easier!
Wednesday, May 27, 2009


Subscribe to:
Posts (Atom)


 famous last words
 with my Truebie Mini


